Designing a Custom Bracket from Scratch in PixyCAD
Brackets are the bread and butter of 3D printing. A shelf needs a corner support. A camera needs to clip onto a tripod arm. A cable wants to stop dangling behind your desk. Nine times out of ten, the part you actually need doesn’t exist on Printables - or it almost exists, but the holes are in the wrong place.
This post walks through designing a custom bracket from scratch in PixyCAD. We’ll start with nothing, end with a printable STL, and along the way cover the handful of tools you’ll reach for in almost every project: sketch, extrude, holes, fillets, and export.
If you’ve never touched CAD before, this is a good place to start. If you’ve used parametric tools and bounced off them, you’ll notice how much shorter the path from idea to part can be.
Step 1: Decide What You’re Designing
Before opening the app, sort out two things: what the bracket has to attach to, and what it has to hold. For this walkthrough we’ll design a simple L-bracket that screws into a wall and supports a small shelf. The numbers we’ll use:
- Wall plate: 60 mm wide, 50 mm tall, 4 mm thick
- Shelf plate: 60 mm wide, 40 mm deep, 4 mm thick
- Two M3 screw holes in the shelf plate, for fixing the shelf from below
Real brackets need real measurements. A pair of digital calipers is the single best investment you can make as a maker. Measure the screws, the wall anchors, and the part you’re mounting before you sketch anything.
Step 2: Start with a Sketch
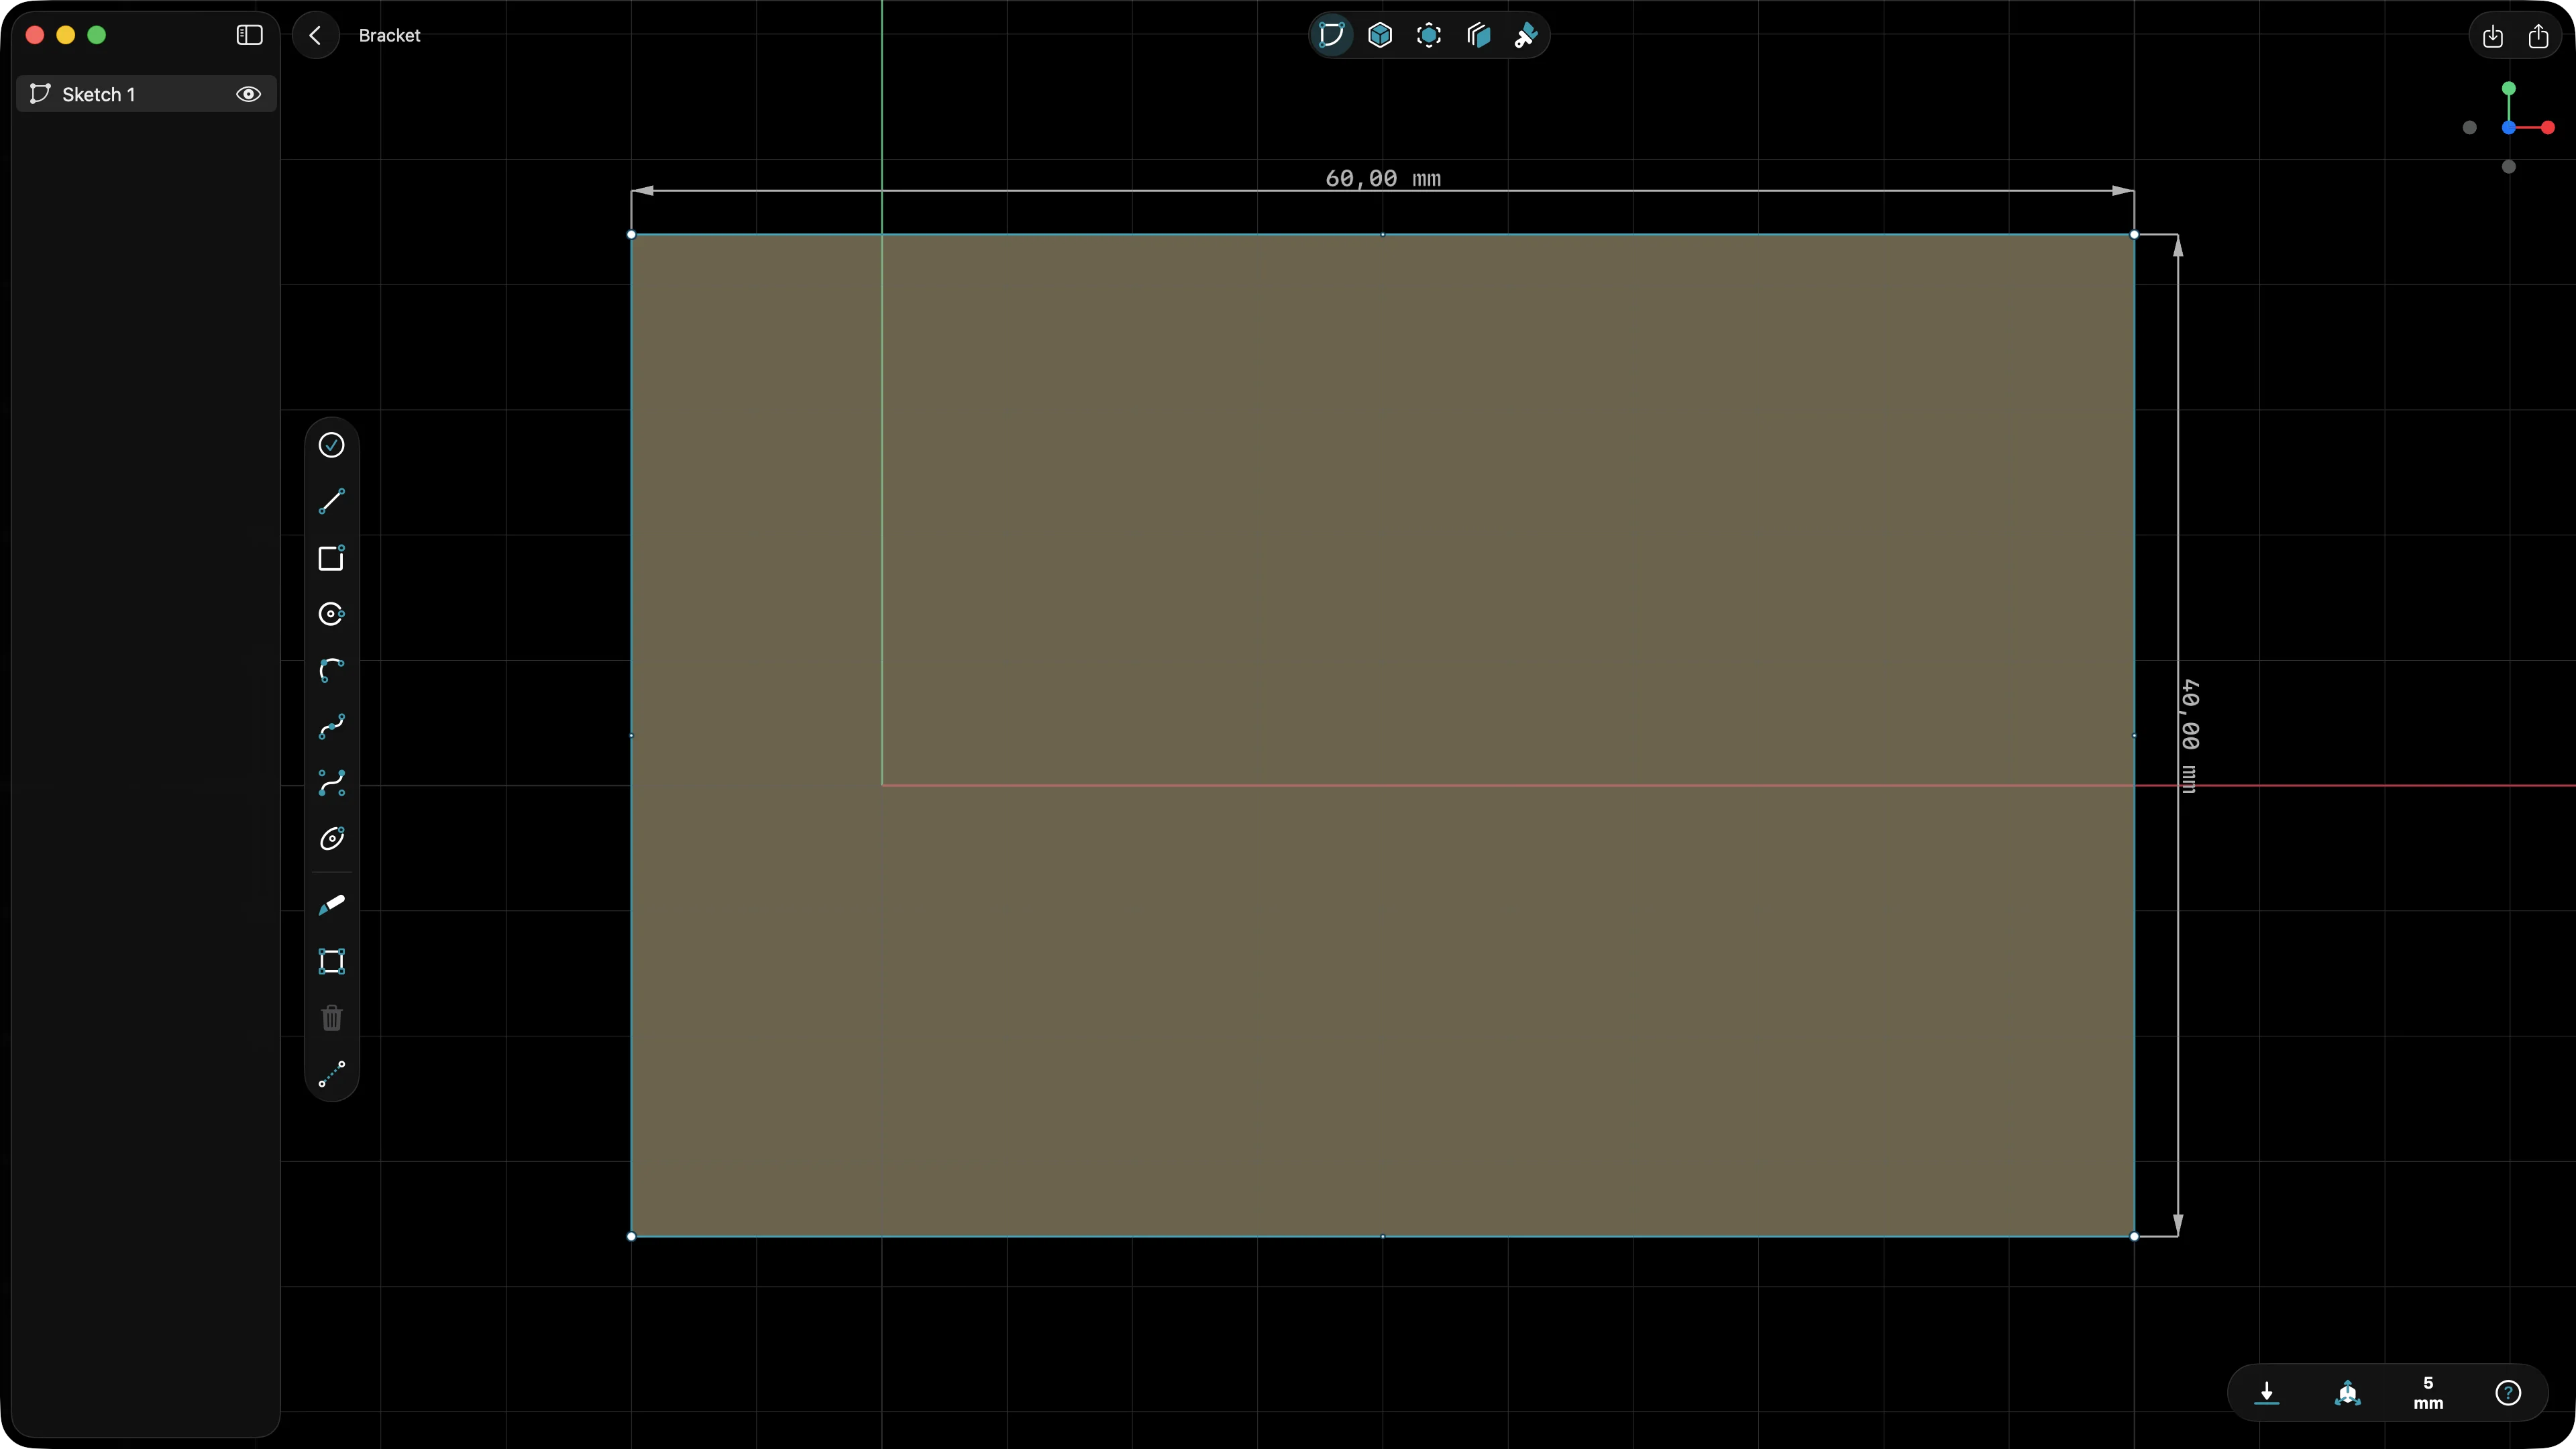
Open PixyCAD and create a new document. Pick a plane to sketch on - the front plane works well here, since we’ll be looking straight at the wall plate.
Drop a rectangle, 60 mm by 50 mm. Don’t worry about getting it perfect with your finger or the Apple Pencil - place it roughly, then tap the dimension and type the exact value. This is the rhythm of CAD on iPad: rough gesture, precise number.
Close the sketch when the rectangle is the right size.
Step 3: Extrude the Wall Plate
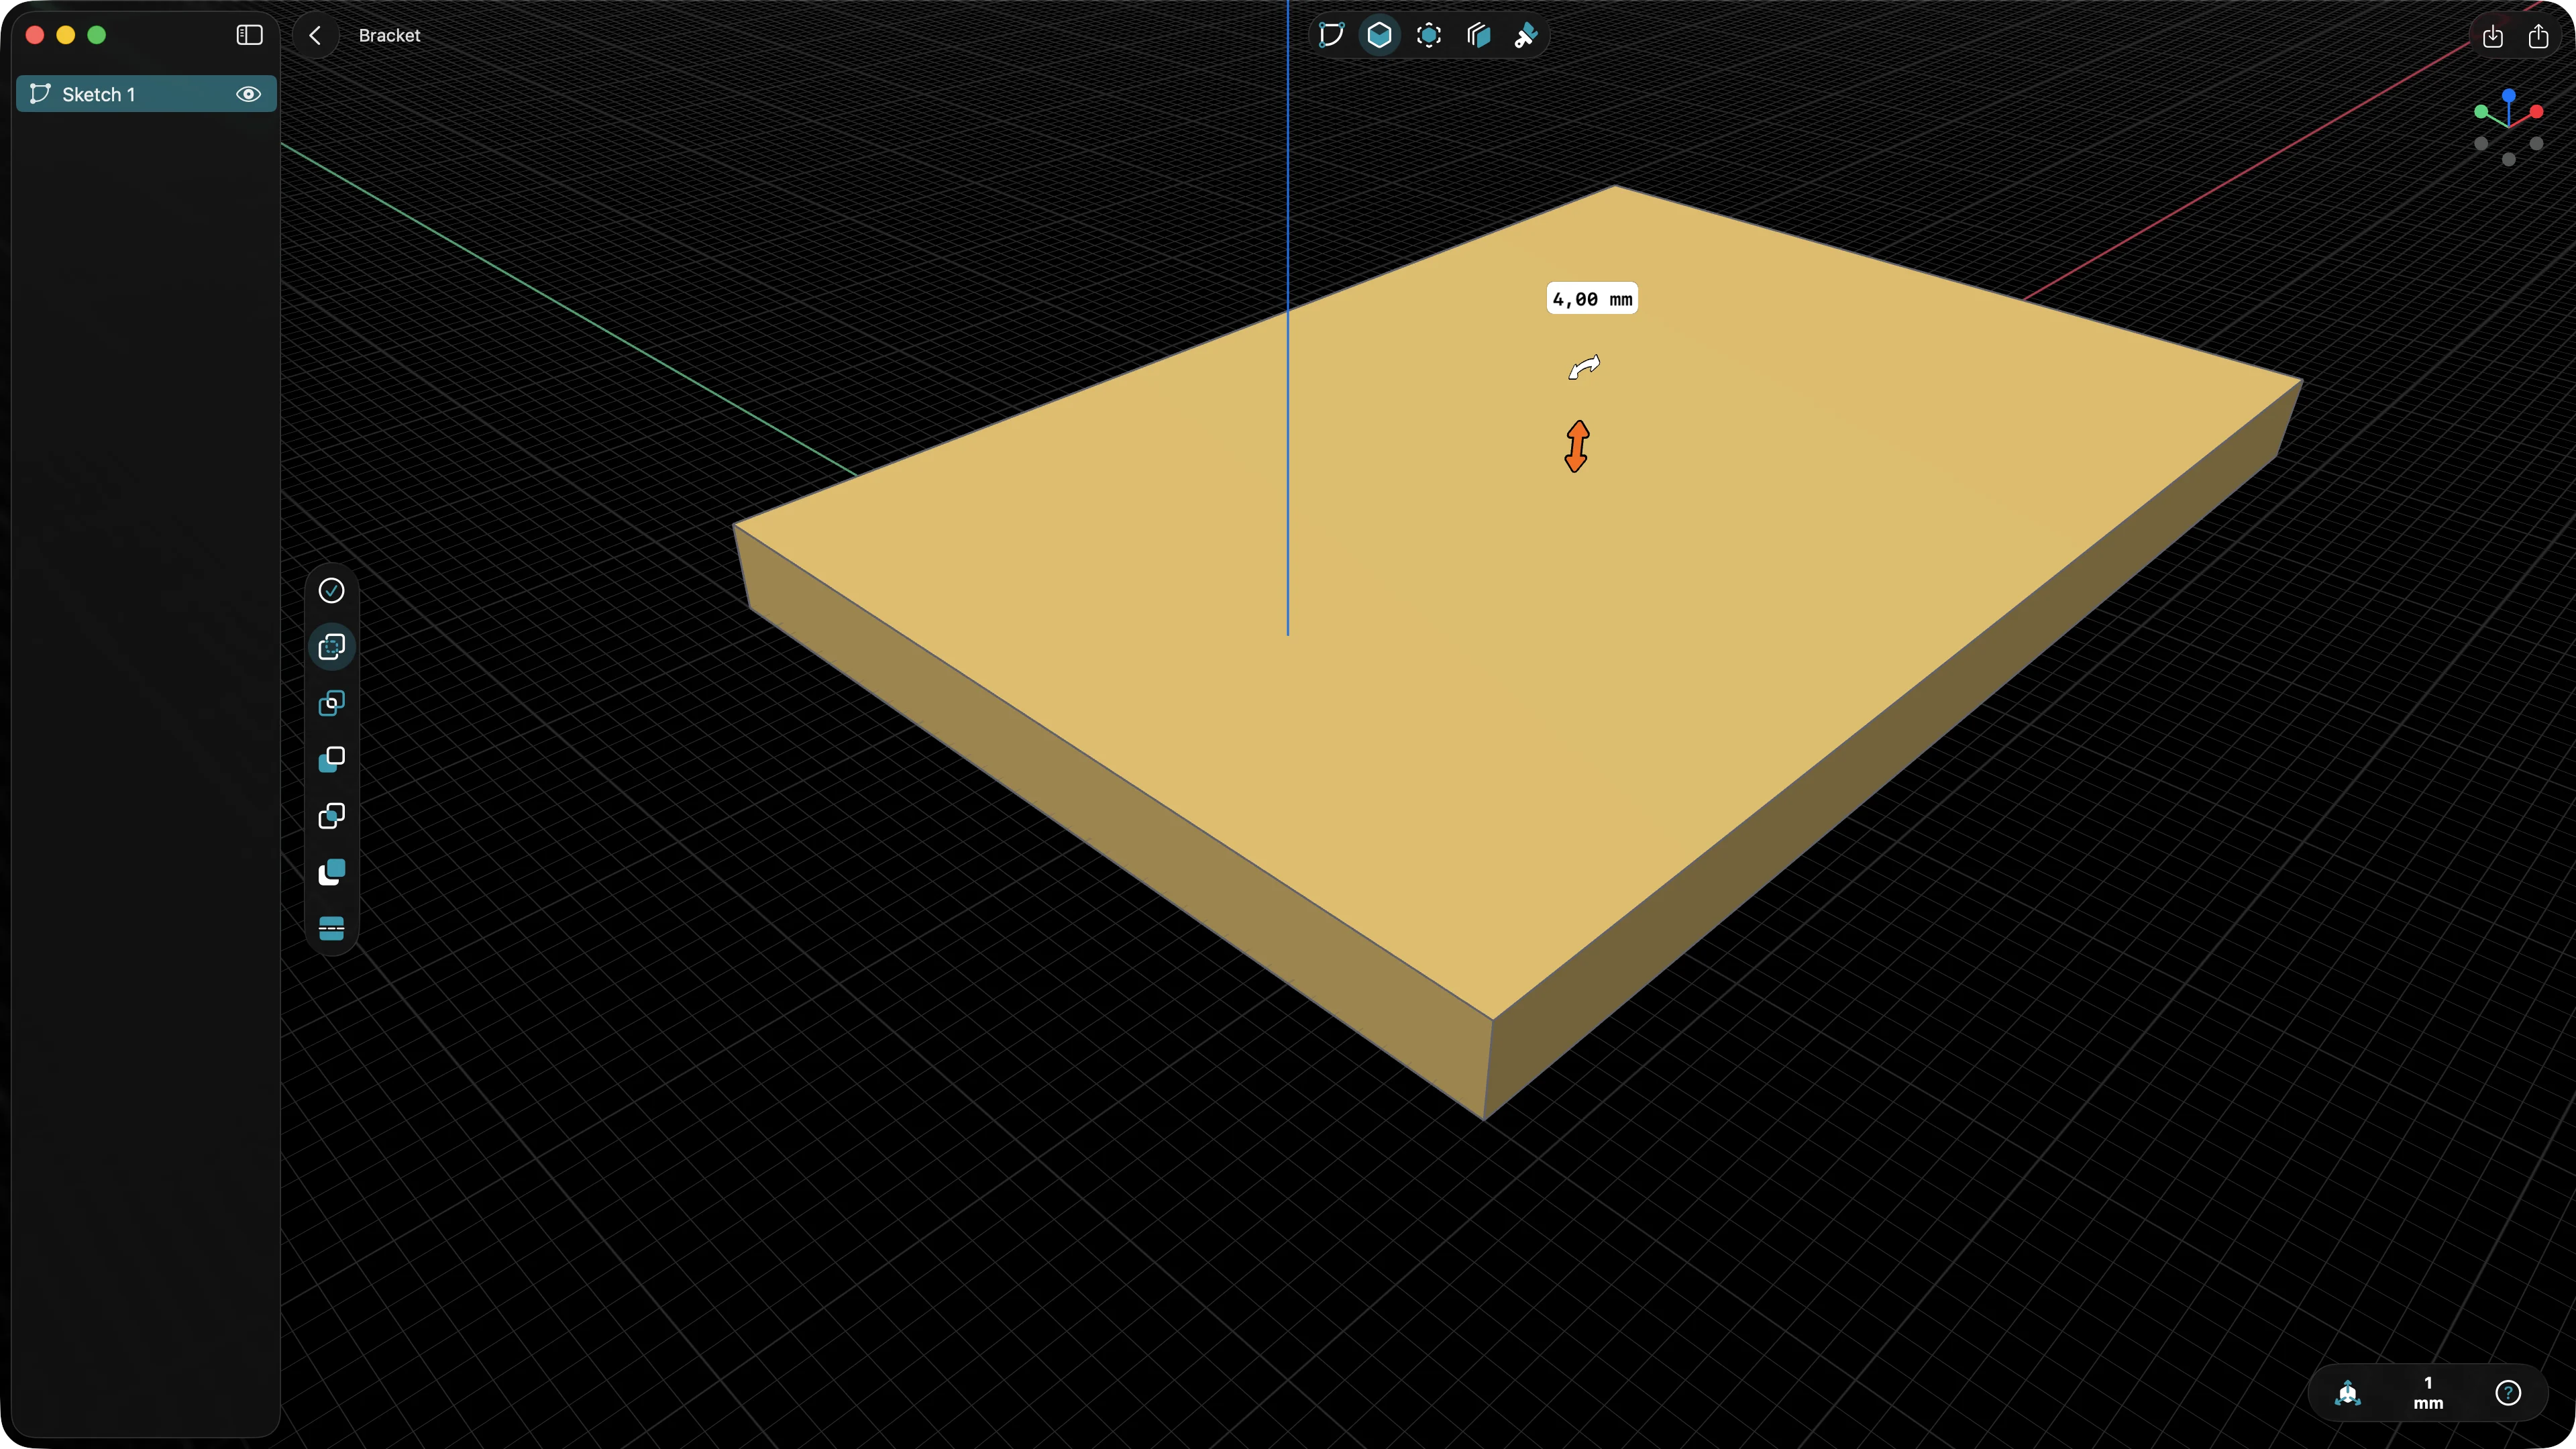
With the sketch selected, choose Extrude and pull it out to 4 mm. You now have a flat slab - the back of the bracket.
This is also where direct modeling starts to feel different from parametric tools. You’re not building a feature tree. You have a solid. From here, every change is a change to the geometry itself.
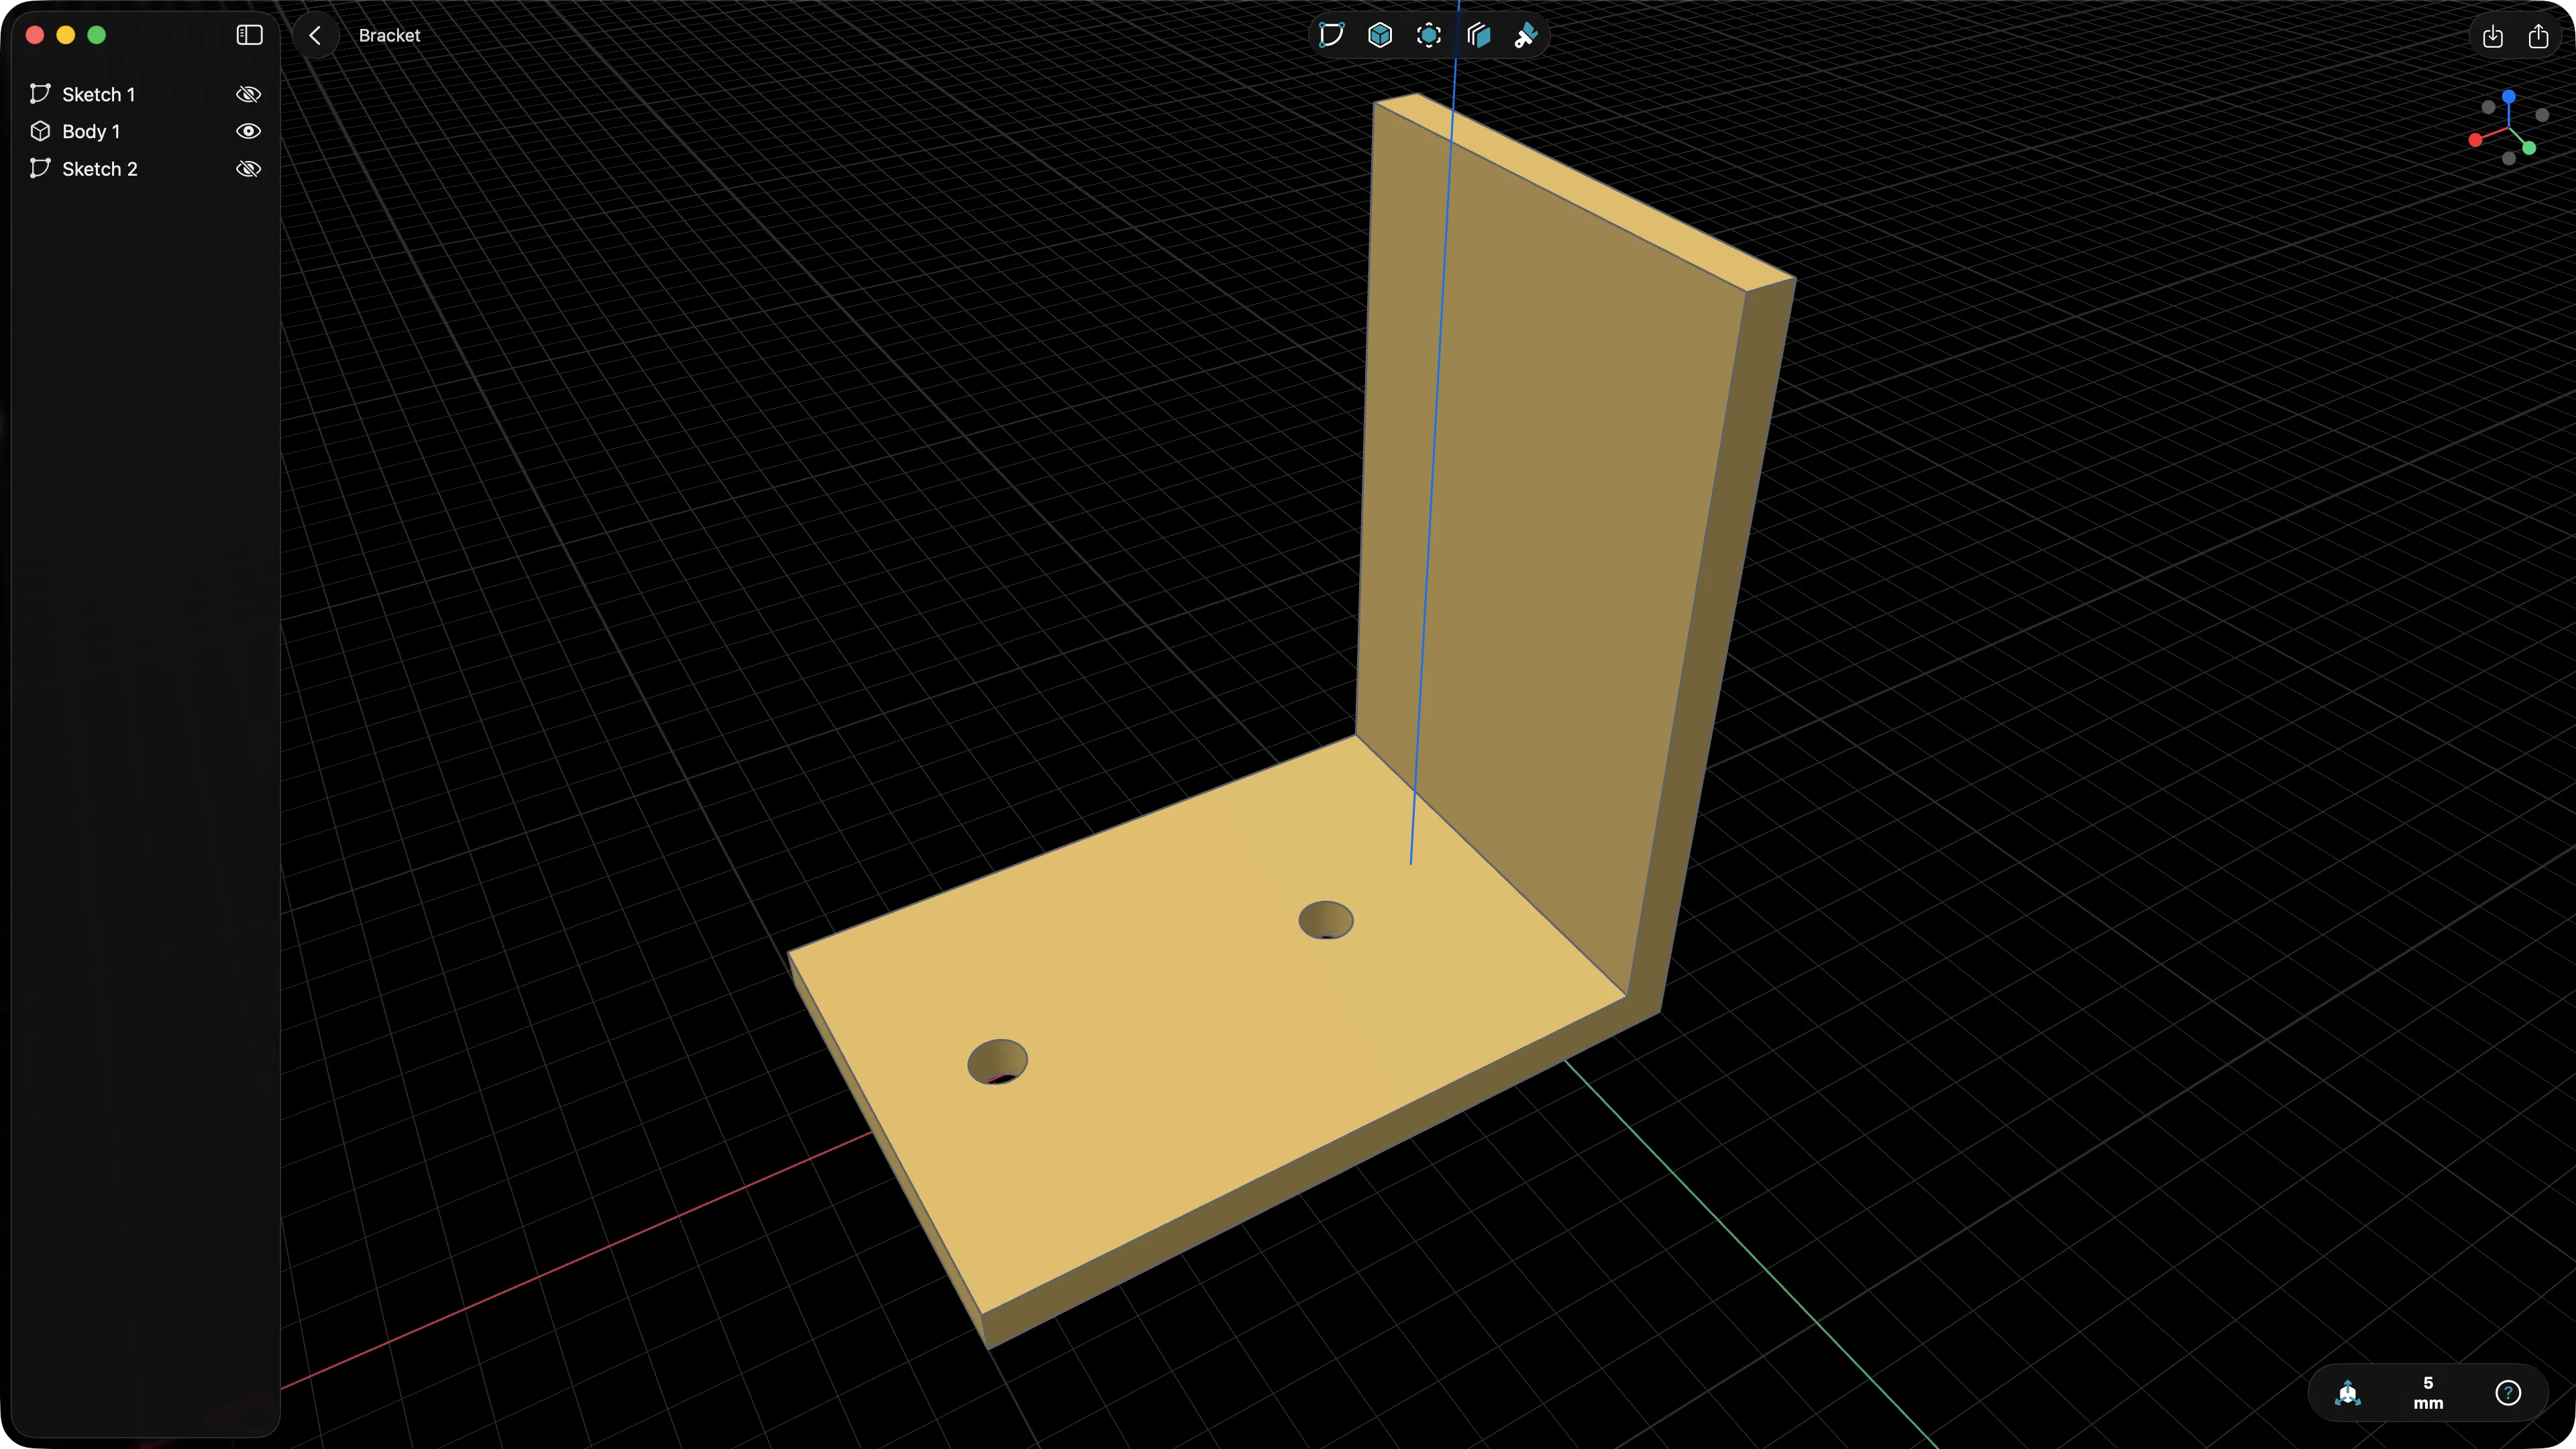
Step 4: Add the Shelf Plate

Pick the bottom edge of the wall plate as your new sketch plane, sketch a 60 by 40 mm rectangle flush with the bottom face, and extrude it 4 mm downward and forward to form the horizontal arm.
You should now have a recognisable L-shape. Rotate the model around with two fingers to check both faces are where you expect them.
Step 5: Drill the Mounting Holes
This is where things get satisfying. Sketch on the front face of the wall plate, place two circles 30 mm apart, dimension them to 4.5 mm diameter (a comfortable clearance for an M4 screw), and use the Hole or Cut Extrude tool to push them all the way through.
A tip from experience: always sketch holes as full circles, not arcs. It saves you from edge cases later if you decide to move them.
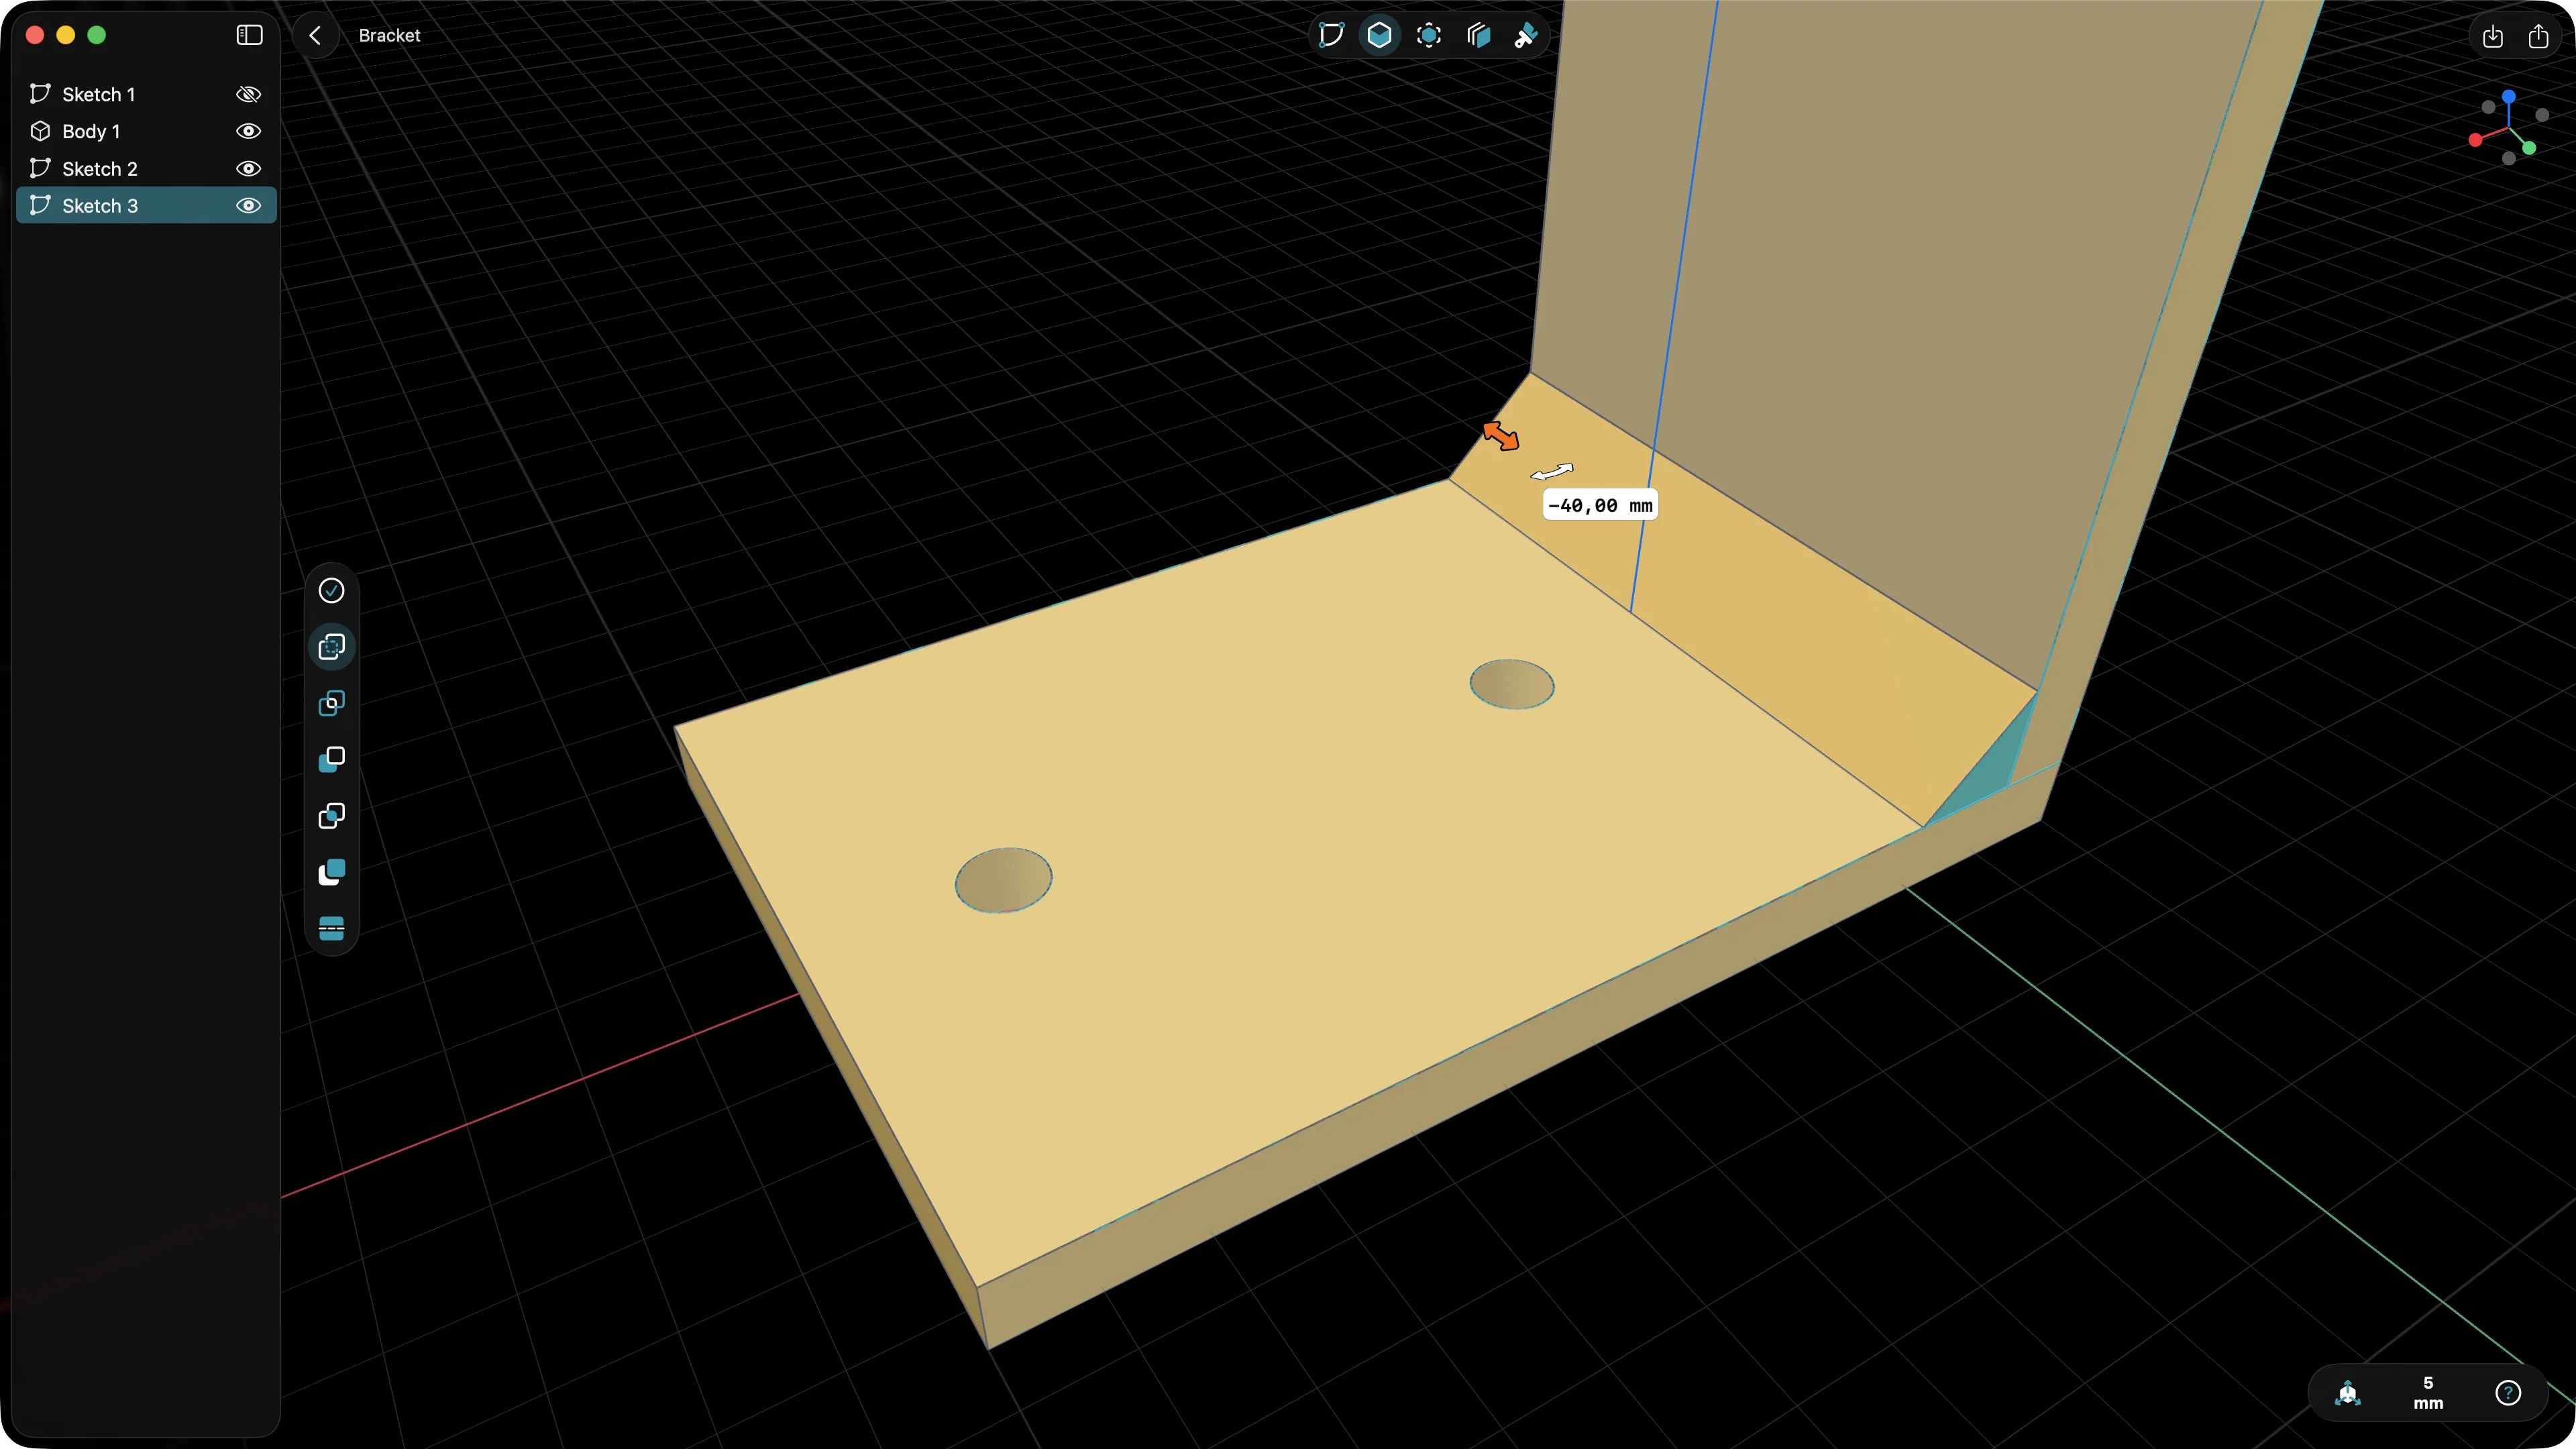
Step 6: Reinforce the Corner
 \
\
A flat L-bracket will flex under load. The fix is a triangular gusset between the two plates.
Sketch on the side face of the bracket, draw a right triangle that runs along the inside corner - say 25 mm up the wall plate and 25 mm along the shelf plate - and extrude it 4 mm. You now have a proper, rigid bracket.
Step 7: Soften the Edges with Fillets
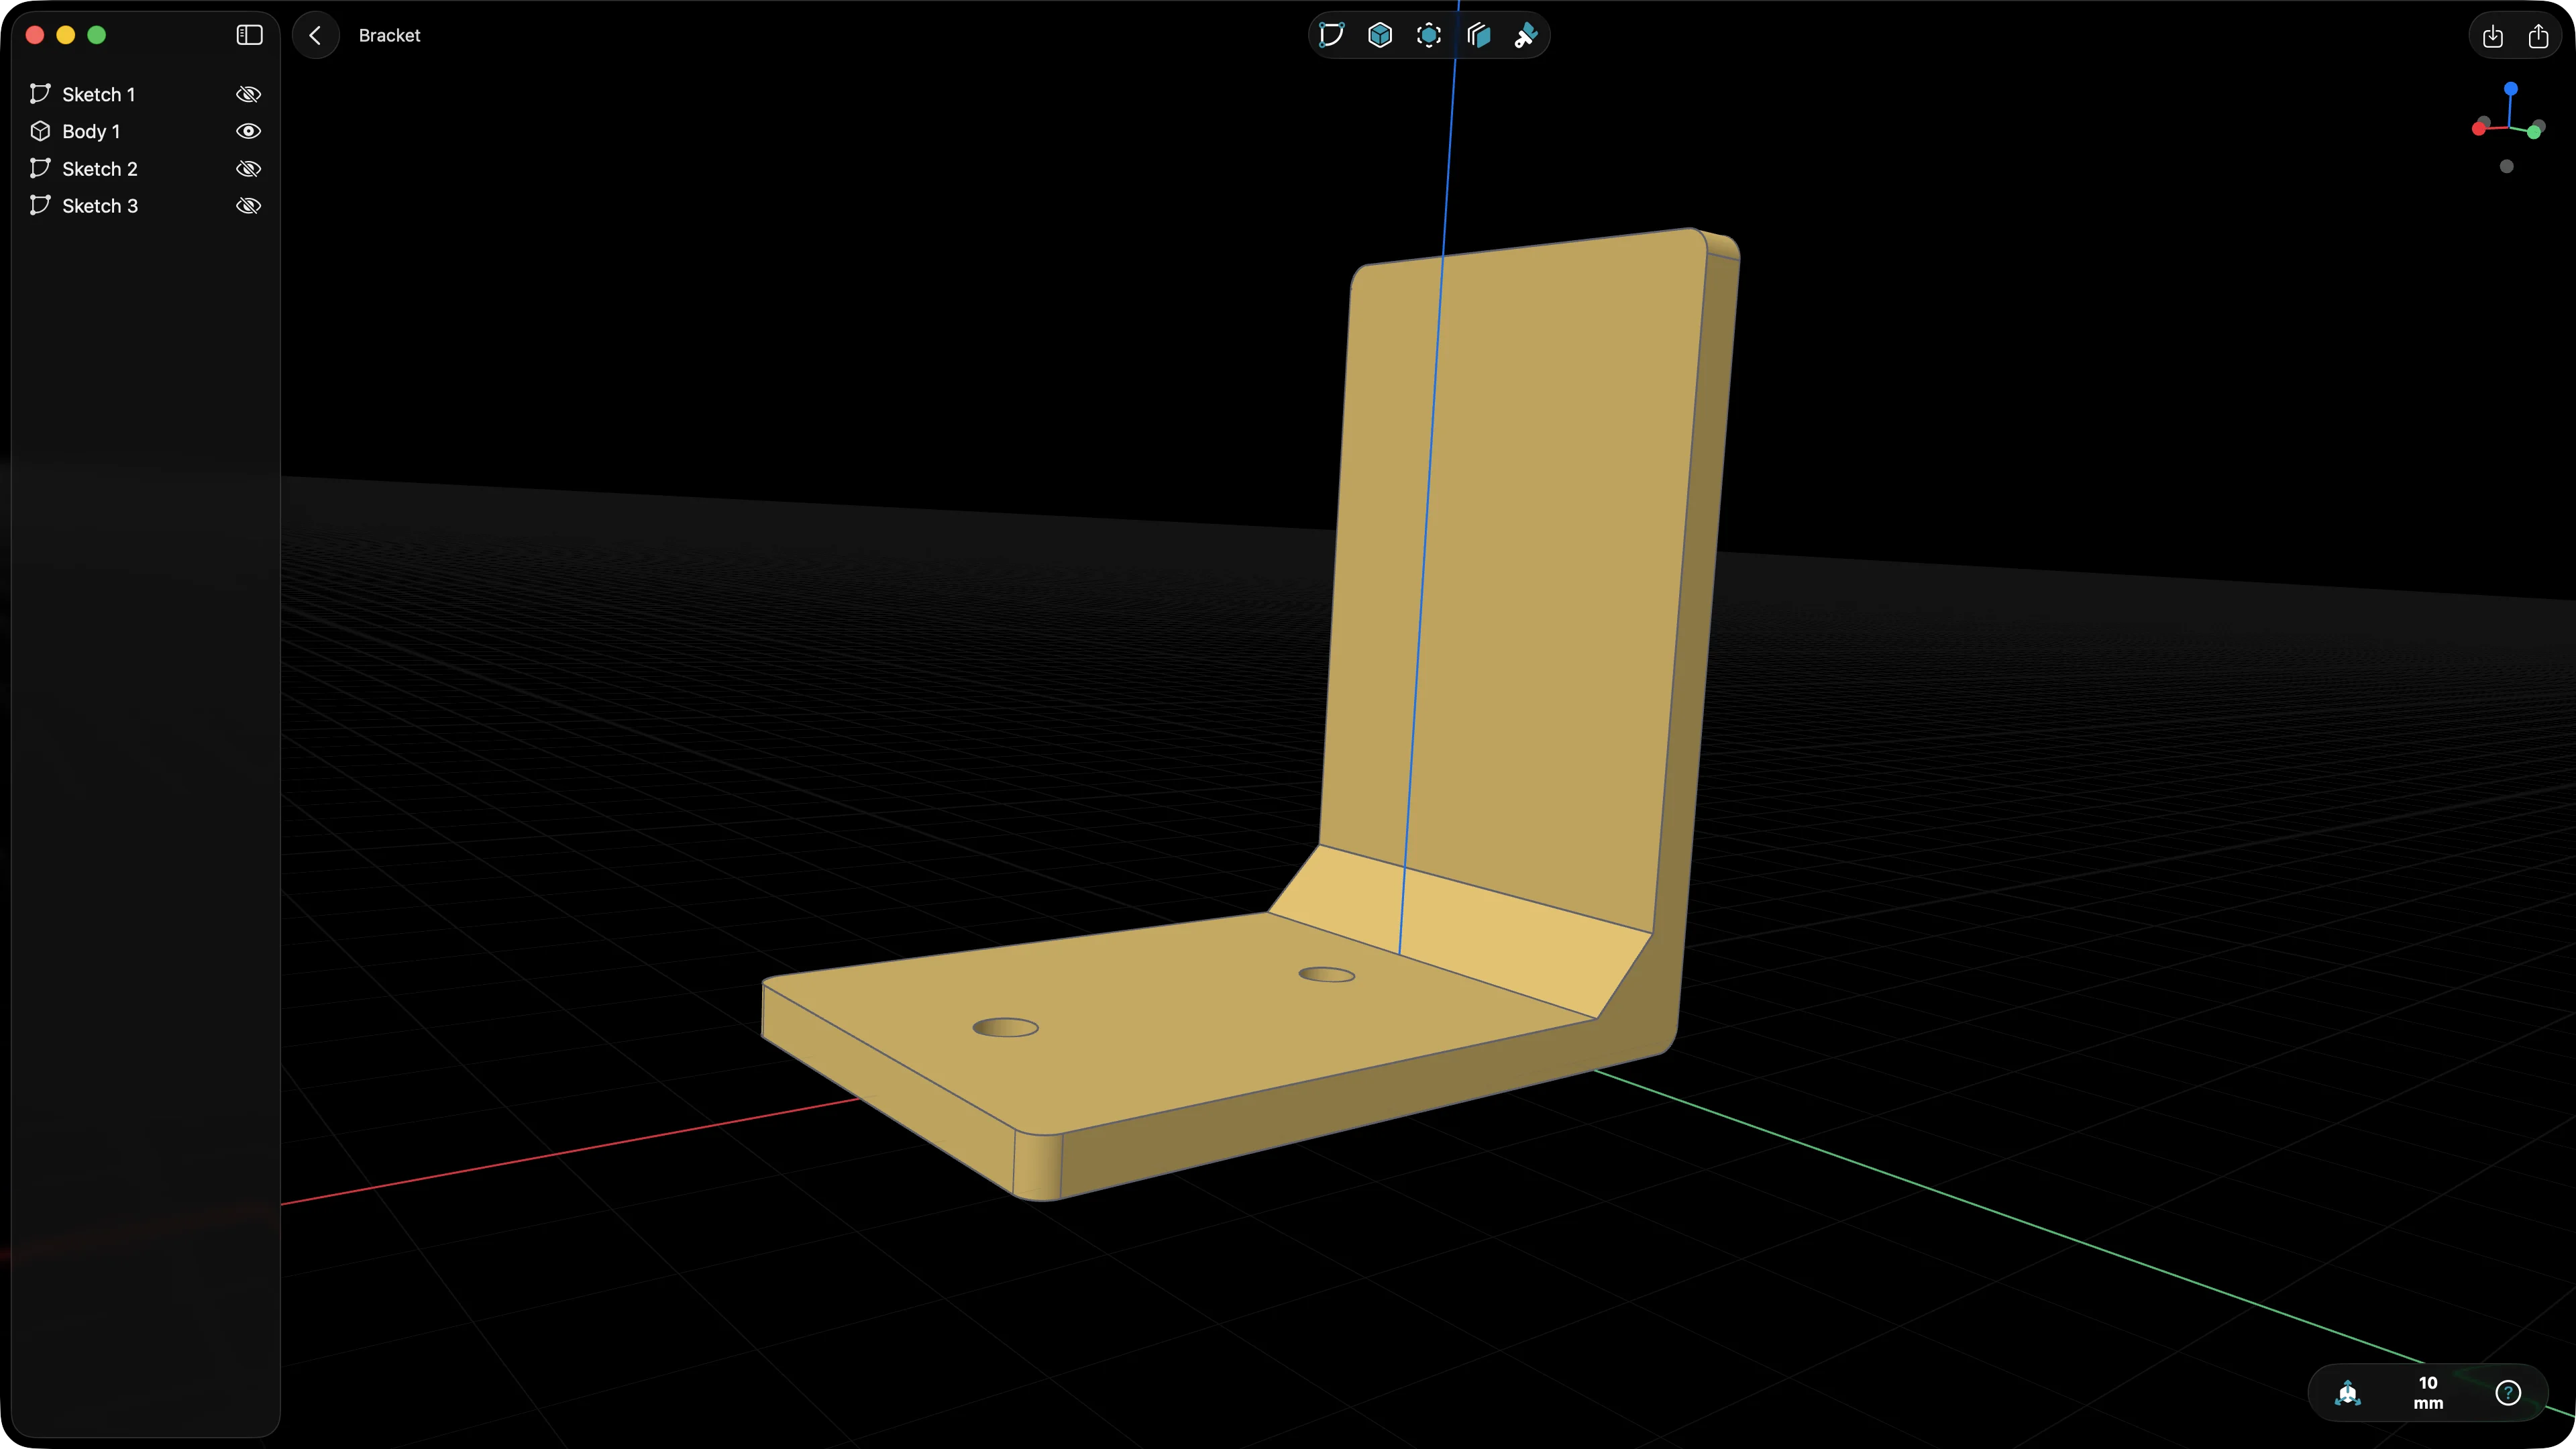
3D-printed parts with sharp corners chip, snag fingers, and concentrate stress. A small fillet fixes all three problems.
Select the outer edges of the bracket and apply a 2 mm fillet. Select the inside corner where the gusset meets the plates and add a 1 mm fillet there too. The part should now look like something you’d actually want to put on a wall.
If the radius isn’t quite right, you don’t have to undo. In direct modeling you can grab the fillet and edit it in place - exactly the workflow we covered in Edit Any 3D Model in Minutes.
Export to STL and Print
Choose Export, pick STL, and save the file. From there it goes to your slicer of choice.
A few print settings worth thinking about for a load-bearing bracket:
- Orient the part so the layers are perpendicular to the load. For a wall bracket, that usually means printing it lying on its back.
- Use 3 to 4 walls and 30 to 50 percent infill. Brackets fail at the walls, not the infill.
- PETG or PLA both work fine for indoor use. PLA is fine for light loads.
Send it to the printer and you’ll have a part in your hands within an hour or two.
What to Try Next
Once you’ve designed one bracket, you’ve designed them all. The same six steps - sketch, extrude, sketch, extrude, holes, fillet - cover an enormous range of printable parts. Phone stands, GoPro mounts, drawer organisers, cable clips, monitor risers. Pick something on your desk that annoys you and design the fix.
If you want to skip the from-scratch part and start by editing an existing model, take a look at Importing a STEP Model and Tweaking It in PixyCAD. Combining the two skills - building from scratch and modifying existing geometry - is most of what real CAD work looks like in practice.
